Guides and advice for your Horse

Guides and advice for your Dog
This is how to set the blades up on our ErgoPro Horse Clippers
Our ErgoPro clippers use Heiniger compatible blades and and below you will see how to set these up correctly

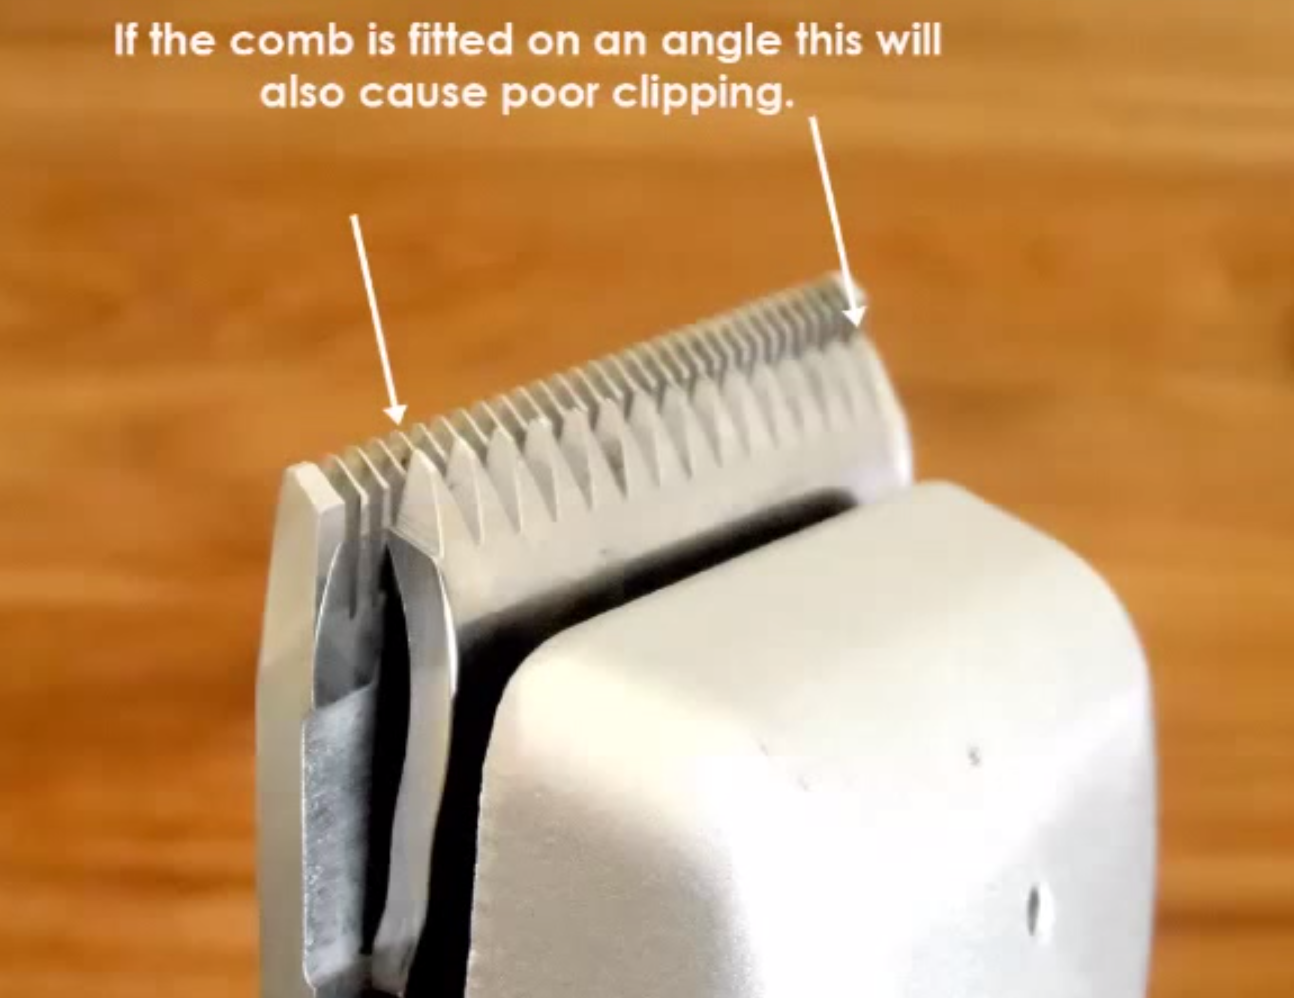
Wolseley and Heiniger blades

Heiniger blades are different to Wolseley blades. On the Wolsely blade above you will see one hole where the screw goes through to attach the comb to the clipper head, Consequently the comb will only sit in one place.

On the Heiniger comb above however, you will see two groves where you screw on to the clipper. This means the comb will not sit in one place and there is movement when you screw the comb in.
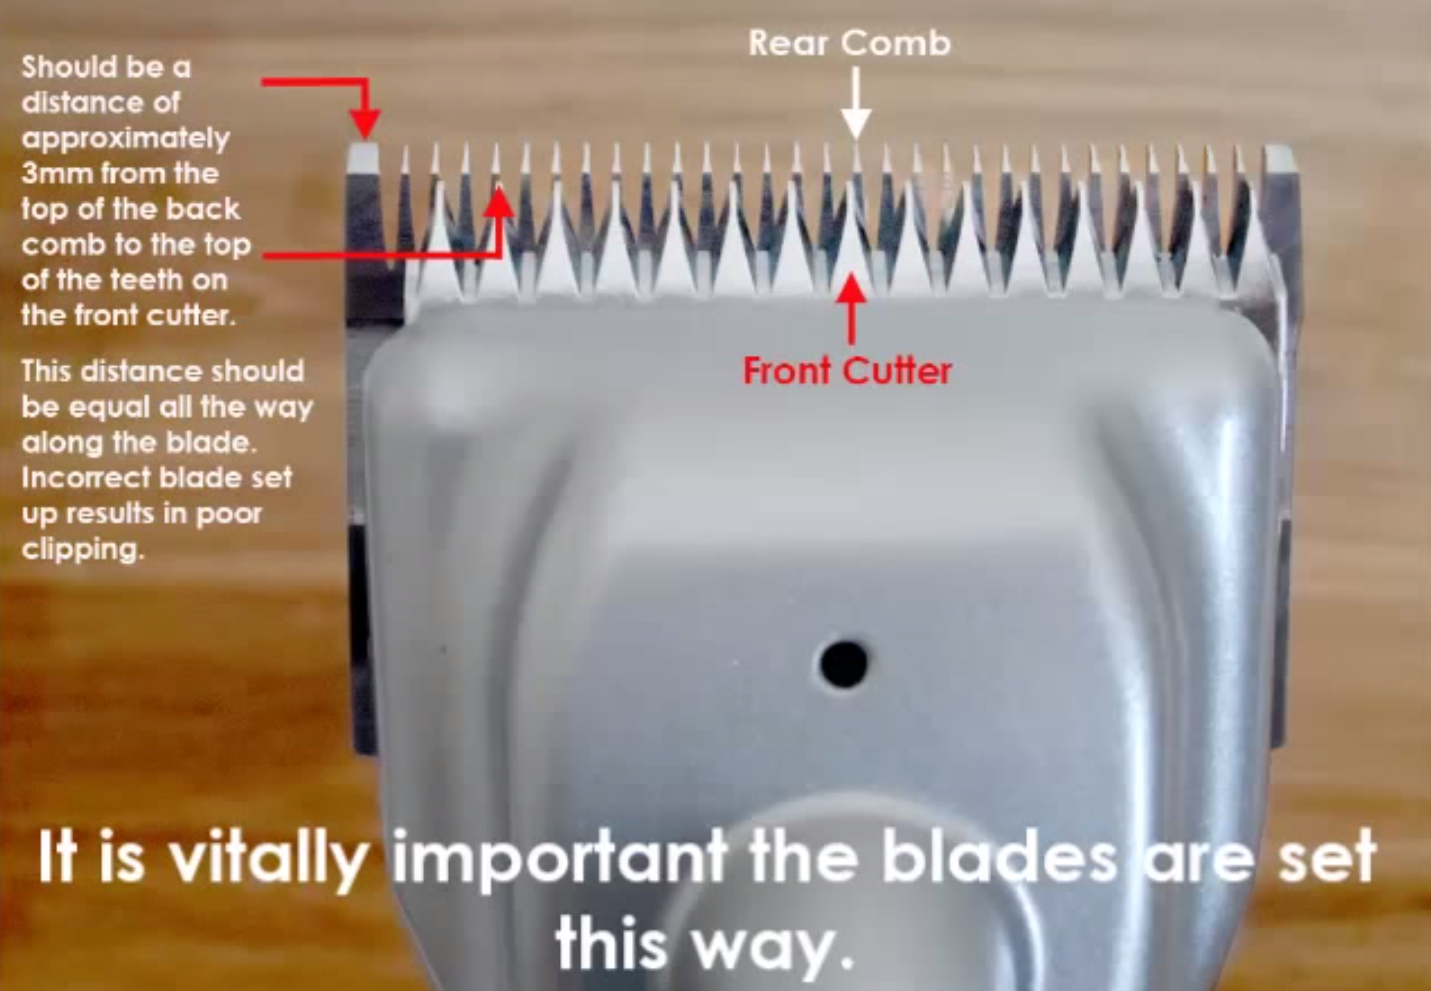
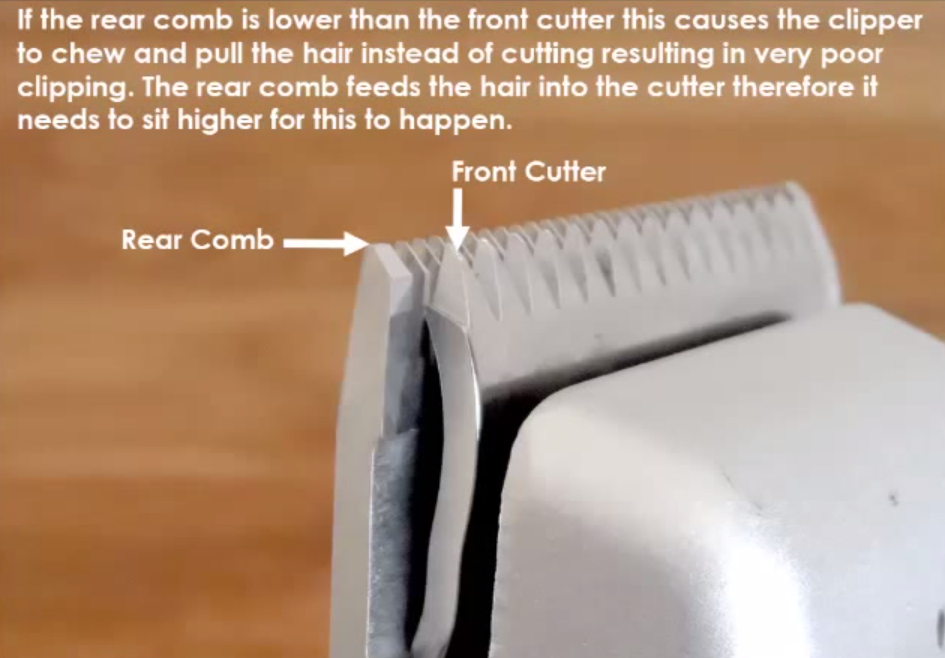
The thing to remember when fitting the Heiniger blades, the teeth of the blade and teeth of the comb should never be flush. The comb should be situated 3-4mm further out than the blade, ie the teeth of the comb should stick out about 3-4mm further than the teeth of the blade on top. Here are some pictures to illustrate:
Below is how the blades should NOT look when installed, the teeth are flush and this way the clipper will more than likely chew and you risk nipping the animal

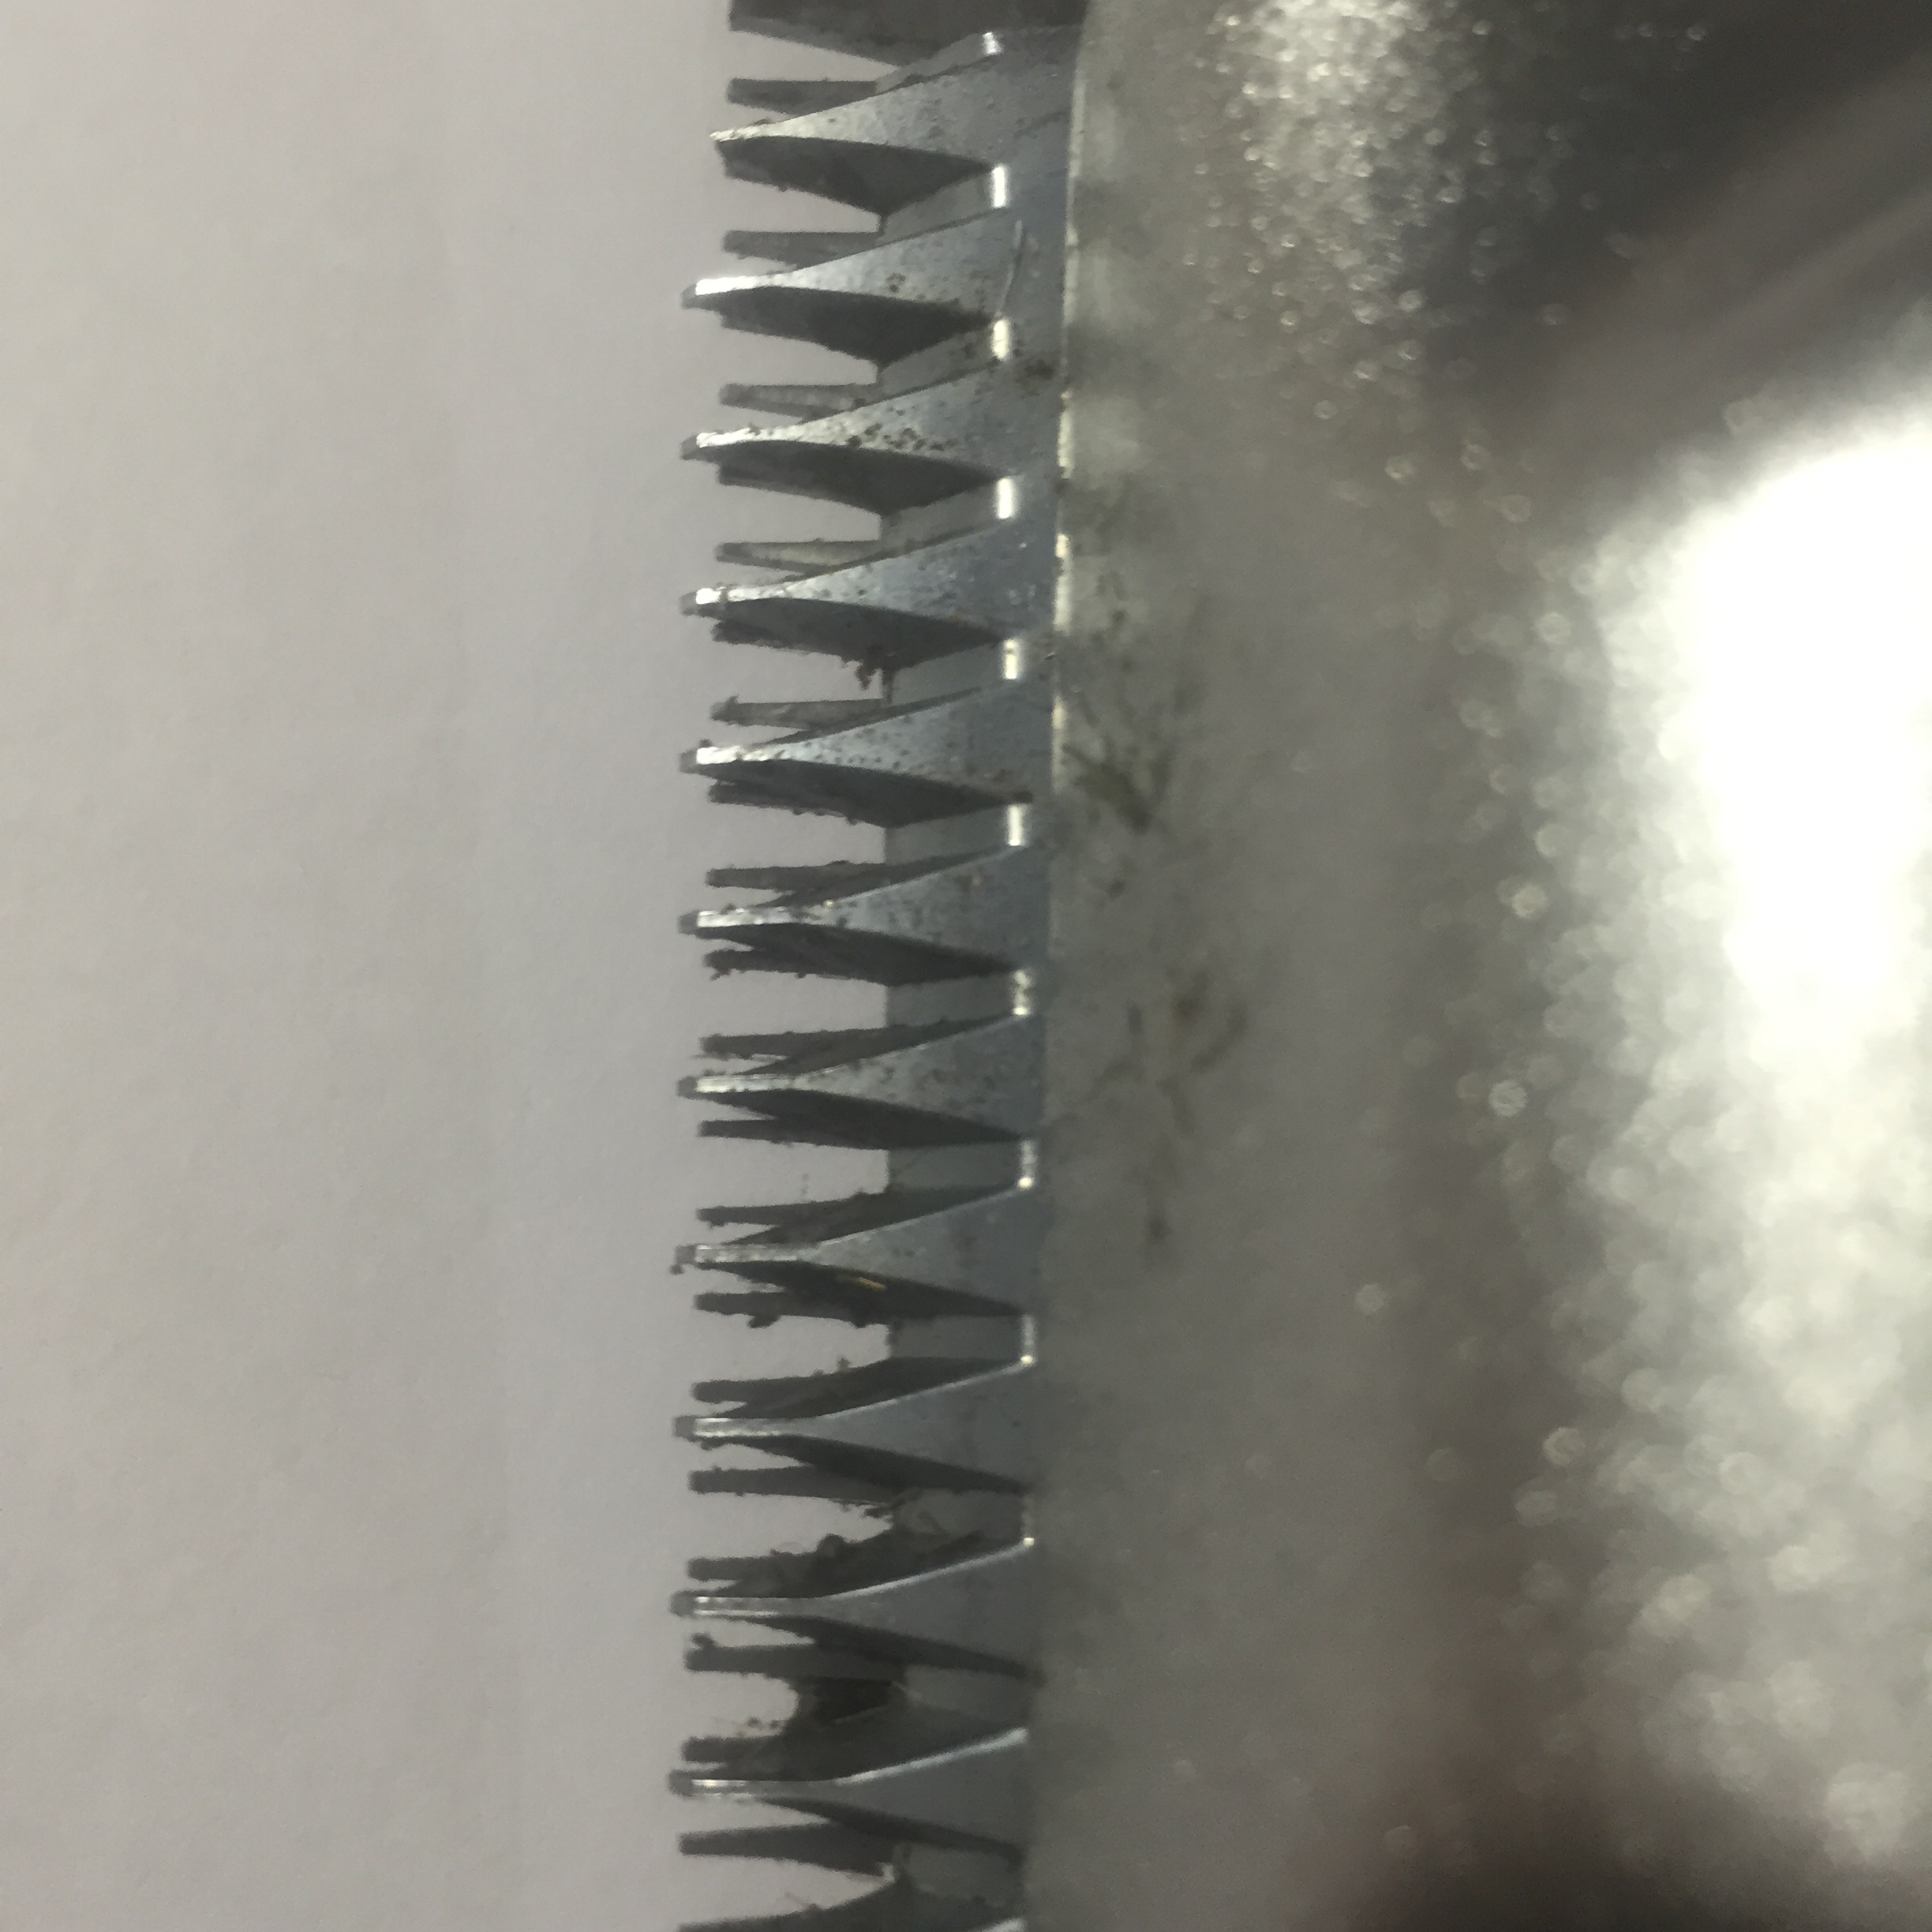
Below is how the blades should look, you will see that the teeth of the comb on the bottom is sticking out further (3mm) than the teeth of the blade on top. This way the clipper will clip well and is not dangerous to touch and you will not risk nipping the animal
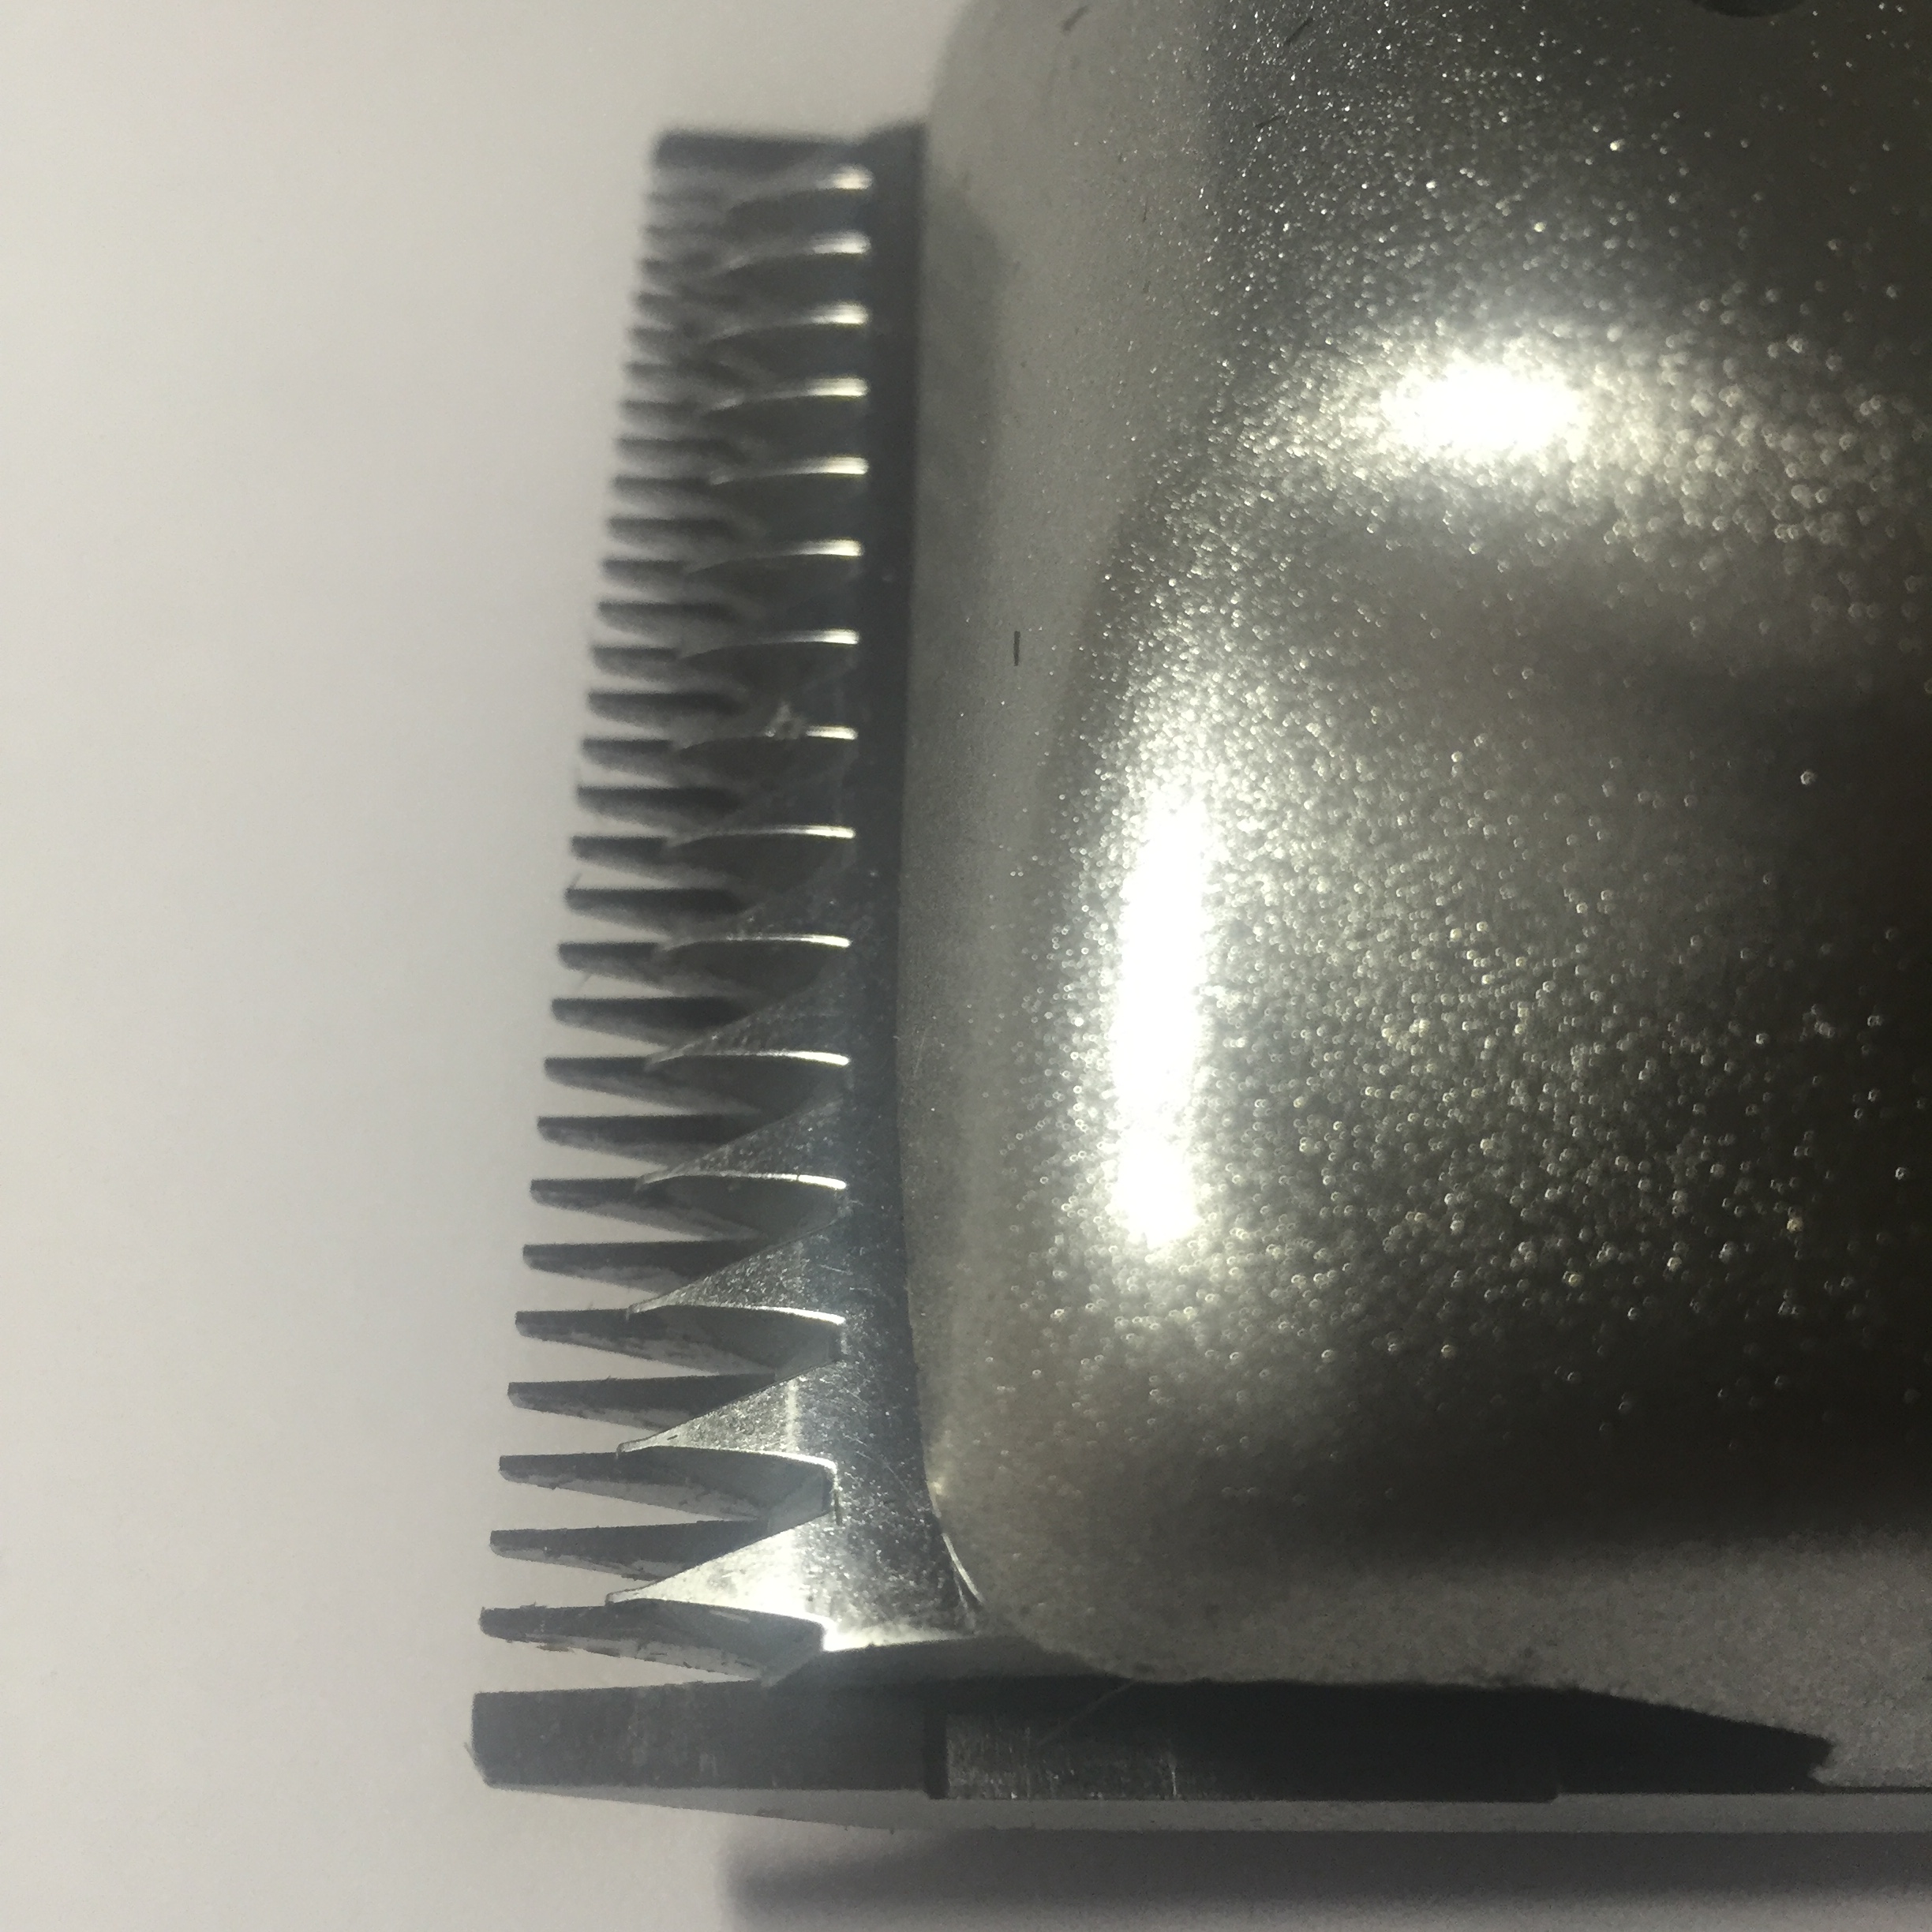
You will notice that setting the blades correctly, will leave a gap behind the comb, behind the screws, as show in the picture below

So to set the blades correctly, unscrew the two screw holding the comb a little, enough so that you can move the comb with your fingers. Then move the comb in place so that the comb is sticking out 3-4 mm further than the blade. Then screw into place, then check that you are happy with where the comb is situated, if not, repeat until you are happy. Job done!
Setting the blades correctly on Heinger compatible clippers can seem a bit fiddly at first, but once you have the hang of it this will become second nature to you!
After setting up the blades there is one more thing to remember and that is setting the tension correctly, this you do by setting the tension screw situated on top of the clipper head.
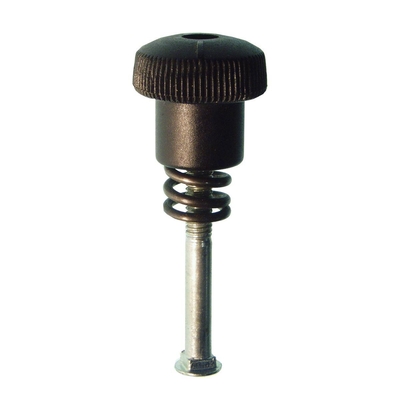
The rule of thumb with tension on blades is that the finer the hair you are clipping, the more tension you want to turn on. To turn on more tension, screw clockwise and less tension screw ant-clockwise
The set the right tension, turn the tension screw all the way on (clockwise) until you feel that it is as tight as it should go. Be careful not to over do this as there are threads that can break in the screw. Once you feel that it is as tight as it should go release the tension by screwing (anti-clockwise) about 1/3 to 1/2 recolution. Start there, try clipping, if they are not clipping well it may be that you need to turn in a little more tension and try clipping again. It's all about finding the sweet spot for your horse or ponies's hair. Again this should become like second nature to you once you get used to it
Please note
If your clipper is not working well, we find that in at least 90% of the cases, it's either the blades that are not set up correctly or the tension is not right.
By setting the blades correctly and having the tension right the ErgoPro clipper will clip beatuifully. If you have any questions regaridng this please do not hesitate to contact us.


